Powering multi-tenant applications with Nuxt
Multi-tenant applications are a powerful architectural pattern that allow developers to build once and serve many. In this article, based on my talk at MadVue 2025 in Madrid, Spain, we explore how Nuxt's robust architecture makes it an ideal platform for creating scalable, customizable, multi-tenant applications.
What is multi-tenancy?
Multi-tenancy is an architecture pattern where a single application, built once, serves many different tenants or customer organizations. You might be familiar with some common examples:
- SaaS platforms like CRMs or project management tools where each customer gets their own isolated workspace while sharing the same application infrastructure.
- E-commerce platforms that power multiple storefronts with different branding and product offerings, alongside shared checkout systems and payment processing.
- Private-label solutions where clients can customize platforms with their own identity and design elements, such as developer portals or dashboards.
- Enterprise ecosystems where large organizations have multiple divisions operating under one unified platform but with division-specific interfaces.
All these examples share the same principle: one codebase serving many distinct customer experiences.
Key characteristics of multi-tenant applications
A proper multi-tenant application has several defining features:
- Shared codebase and infrastructure: The app is built and deployed utilizing a single codebase, drastically reducing maintenance overhead and ensuring all tenants benefit from new features and bug fixes simultaneously.
- Isolated tenant data: Data separation is typically achieved through a combination of storage partitioning and application-level access controls.
- Content and UX customizable per-tenant: Tenants can fully customize the content, layout, and visual elements of the app, creating unique branded experiences for their users.
Benefits of multi-tenancy
- Easier maintenance: Since all tenants use the same application instance, updates, bug fixes, and feature enhancements are applied globally with minimal effort.
- Cost efficiency: Maintaining a single codebase for multiple tenants reduces overhead for development and operations. You don't need to duplicate the entire infrastructure for each instance.
- Consolidated monitoring and reporting: You can easily aggregate data across tenants for analytics and insights, which can be beneficial for product development and marketing strategies.
The challenge of scale
While the concept of multi-tenancy offers numerous benefits, it also introduces complexities:
- Handling tenant-specific content and configurations
- Maintaining separate branding and UX per tenant
- Managing different authentication strategies and authorization across tenants
- Ensuring performance with varying traffic loads
Many teams end up with separate codebases or end up performing separate builds for each tenant, which can quickly become unmanageable and very expensive.
But what if you could maintain a single codebase while still delivering fully customized experiences for each tenant? This is precisely where Nuxt's architecture shines.
![]()
Nuxt makes multi-tenancy easy
Nuxt, along with the Nitro server, provides a robust set of features and capabilities that make it an ideal choice for building scalable, maintainable, and customizable multi-tenant applications.
Let's walk through some of the key features that make Nuxt a great choice for multi-tenant applications.
Key features for multi-tenancy
- Runtime Configuration Capabilities: Allows for dynamic loading of tenant-specific settings and features without needing to rebuild the application for each tenant.
- Nitro Server Engine: Powerful plugins, middleware, and event handlers enable Nuxt to seamlessly read and write to storage providers, proxy requests to external APIs, and implement tenant-aware request handling and caching strategies.
- Nuxt Module Ecosystem: Easily extend functionality and add tenant-specific features based on dynamic configuration.
- SSR & SEO: Server-side rendering and built-in head management for tenant content and metadata.
- Edge Deployment Compatibility: Nuxt apps can be deployed at the edge, dramatically reducing latency while enabling powerful caching strategies that scale automatically.
Tenant detection
Before we can customize our application for each tenant, we need to detect which tenant is being requested. This is typically done on the server by examining the client request, which is where a Nitro plugin or middleware comes into play.
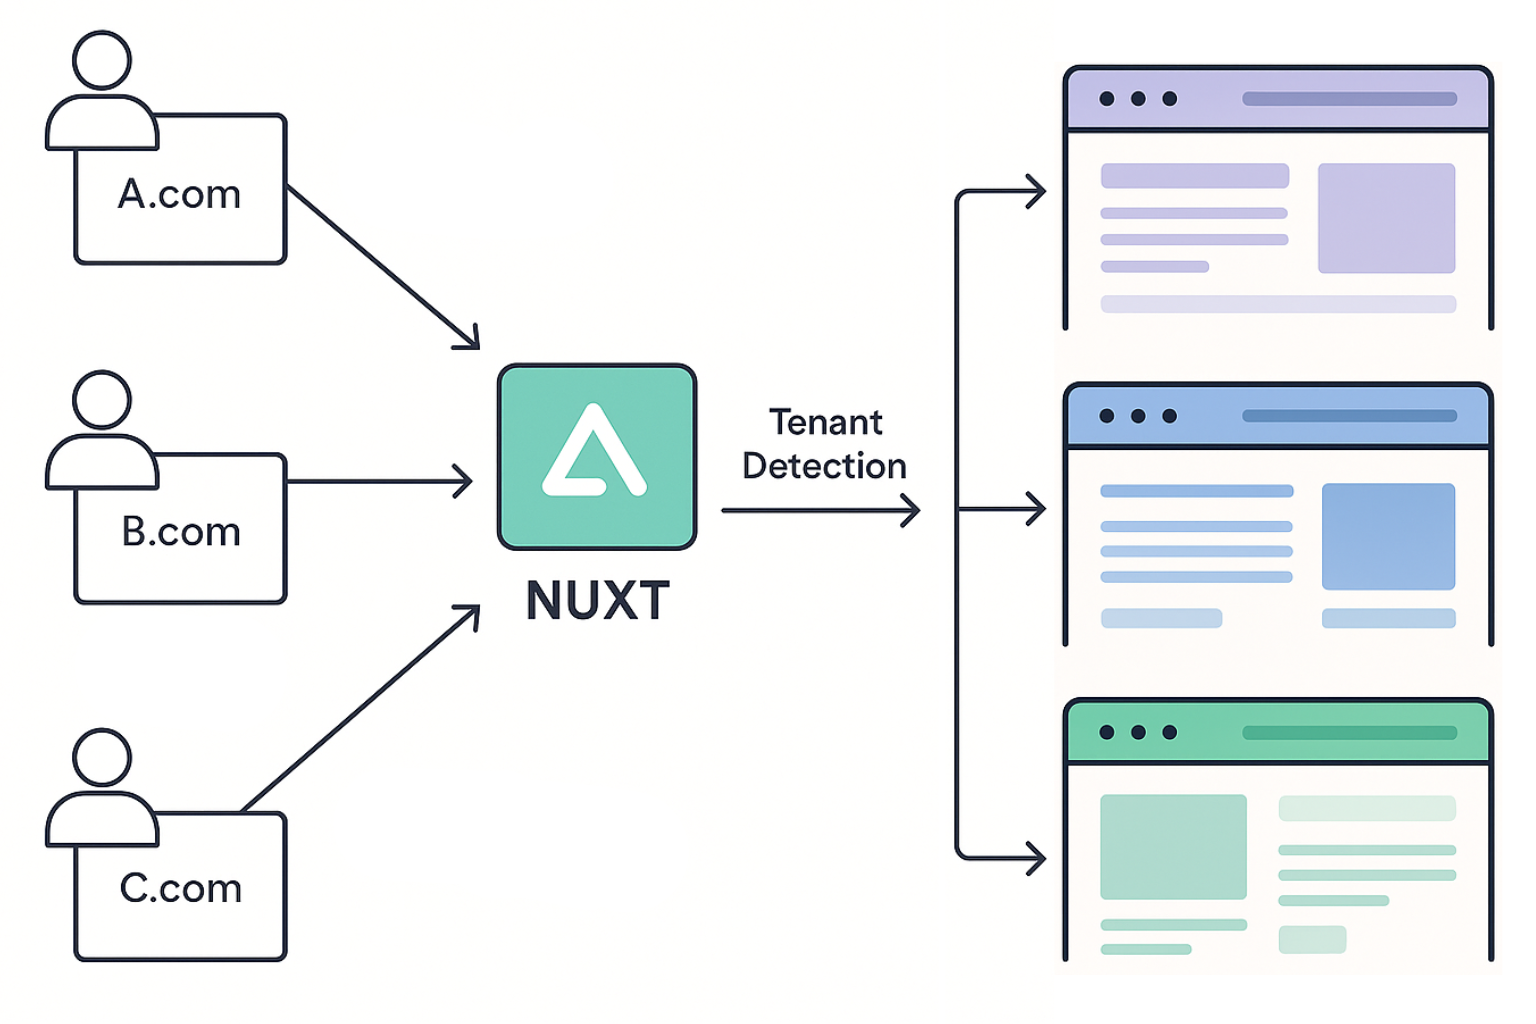
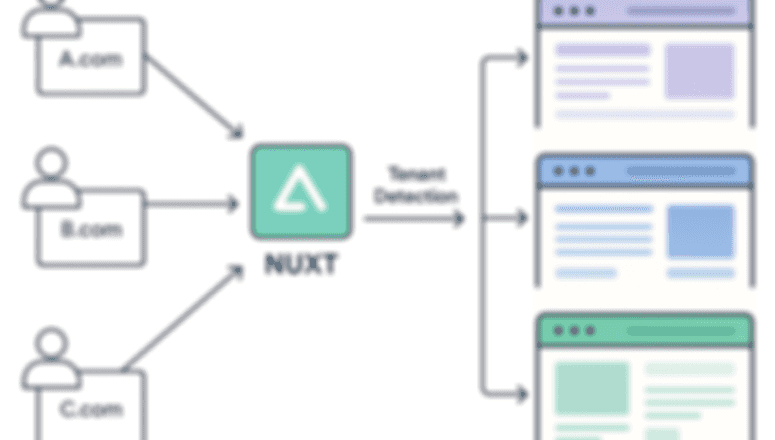
A typical multi-tenant setup utilizes a single deployment, separating tenants via subdomains or through custom domains mapped via CNAME records. For example, if a user accesses tenant-a.app.com, we can infer that they are requesting this particular tenant's application and can then fetch the appropriate data and configuration for that tenant.
Setting up tenant detection
To get started, we'll create a few helpers:
- A custom
$fetchinstance to make API requests from the client to our Nitro server while automatically attaching the request headers. - A custom
useApicomposable to simplify data fetching. - A Nitro plugin to extract tenant info from the custom headers and add it to the event context to make it available to all server routes and middleware.
Create a custom $fetch plugin
First, let's create a custom $fetch instance that will be used to make all API requests from the client to our Nitro server.
This will allow us to attach custom headers to all requests, as well as proxy any external API requests as needed through our Nitro server's catch-all route that we will set up later.
Start by creating a new file in our plugins directory for our $fetch instance with the following code:
export default defineNuxtPlugin((nuxtApp) => {
  const requestHeaders = useRequestHeaders()

  const api = $fetch.create({
    onRequest({ request, options, error }) {
      options.headers = {
        ...(options.headers || {}),
        // Always include the original client request headers
        ...requestHeaders,
        // Add custom tenant-specific headers to all requests that
        // go through our custom $fetch instance
      }
    }
  })

  return {
    provide: { api }, // Expose helper to useNuxtApp().$api
  }
})
This plugin creates a custom $fetch instance that automatically attaches the tenant hostname to all outgoing requests, making it available on the Nitro server.
The plugin:
- Accesses the original client request using several of Nuxt's built-in composables.
- Passes along the original client request headers to the server.
- Finally, exposes the custom
$fetchinstance to the Nuxt app so that it can be used in our components and pages.
With our Nuxt plugin registered, $api is exposed from useNuxtApp() to make API calls directly from our Vue components and other app code.
We can also wrap $api with useAsyncData to avoid double‑fetching data during server‑side rendering (server & client on hydration).
<script setup lang="ts">
const { $api } = useNuxtApp()
const route = useRoute()
const pageKey = computed(() => `page-${route.path.replace(/\//g, '-')}`)

const { data: pageData } = await useAsyncData(
  pageKey,
  // Use our `$api` instance
  () => $api(`/api/pages/${encodeURIComponent(route.path)}`),
)
</script>
Create a custom useFetch composable
Instead of using useAsyncData and $api directly, we'll create a new useApi composable that wraps Nuxt's useFetch and utilizes our custom $api instance.
// app/composables/useApi.ts
import type { UseFetchOptions } from 'nuxt/app'

export function useApi<T>(
  url: string | (() => string),
  options?: UseFetchOptions<T>,
) {
  return useFetch(url, {
    ...options,
    $fetch: useNuxtApp().$api as typeof $fetch
  })
}
Now we can fetch data in our components with much cleaner code:
<script setup lang="ts">
const route = useRoute()
const pagePath = computed(() => encodeURIComponent(route.path))

const { data: pageData } = await useApi(() => `/api/pages/${pagePath.value}`)
</script>
Nitro plugin for tenant context
We can access the original request host on the Nitro server to identify the tenant and attach the tenant info to the event.context so that it is available to all server routes and middleware.
Start by creating a new Nitro plugin with the following code:
// server/plugins/00.tenant-context.ts
export default defineNitroPlugin((nitroApp) => {
  nitroApp.hooks.hook('request', async (event) => {
    // Get the request host for dynamic request routing
    // without considering the `X-Forwarded-Host` header which could be spoofed.
    const hostname = getRequestHost(event, { xForwardedHost: false })
    const id = await useStorage('kv').getItem<string>(`tenant:id:${hostname}`)

    // Attach tenant data to the event context to make it
    // available to all server routes and middleware.
    event.context.tenant = { id, hostname, /* etc... */ }
  })
})
- We hook into the
requestevent to get the original client request headers. - The tenant hostname from the original request host is captured in the Nitro plugin. The hostname will be used to determine the tenant identity when accessing our storage provider, and can be utilized to look up tenant data when proxying requests to external APIs.
- We can utilize the
hostnameas the unique part of the key to look up the tenant's ID in our Edge storage provider. - Finally, our tenant data is attached to the event context, making it available to all server routes and middleware.
For TypeScript support, we can also augment the H3EventContext interface:
// server/event-context.d.ts
import type { H3EventContext } from 'h3'

declare module 'h3' {
  interface H3EventContext {
    tenant: {
      /** The tenant ID. */
      id: string
      /** The tenant client hostname. */
      hostname: string
    }
  }
}

export {}

Accessing tenant data
Now that we have identified the tenant, we can use the tenant's unique identifier to fetch or store data on the Edge in a tenant-aware manner.
Tenant-aware storage
Let's say we want to fetch the tenant's theme name from their configuration data and add it to the <head> of our application with a Nuxt plugin.
First, let's create a new plugin file that we can use to fetch config data and add our theme attribute to the <head> element of the page.
- We will fetch the tenant config data using our
useApicomposable - Then we'll use the
useHeadSafecomposable to add adata-themeattribute to the root<html>element of the app. - The
data-themeattribute can then be utilized in our CSS to apply the style rules for the tenant's theme.
export default defineNuxtPlugin({
  name: 'tenant-theme',
  async setup() {
    const { data: tenantConfig } = await useApi('/api/config')

    useHeadSafe({
      // Add a `data-theme` attribute to the root <html> element
      htmlAttrs: { 'data-theme': tenantConfig.value?.theme?.name || 'default' },
    })
  },
})
The attribute can then be utilized in our CSS to apply the style rules for the tenant's theme:
:root[data-theme="midnight"] {
  --color-background: #181825;
  --color-text: #fff;
}
:root[data-theme="default"] {
  --color-background: #fff;
  --color-text: #111;
}
Creating the config API endpoint
We'll set up a Nitro server route that will handle the /api/config request, and use the tenant's id to fetch the appropriate data from our storage provider.
For our example, we will assume that each tenant's configuration is stored as JSON in our KV storage on the Edge with a key in the format tenant:config:<id>.
To get started, let's create a new file at /server/api/config.get.ts and create an event handler that will retrieve the tenant's configuration:
export default defineCachedEventHandler(async (event) => {
  const { id, hostname } = event.context.tenant
  // Retrieve tenant configuration from KV storage
  // using the tenant's ID as the key
  const config = await useStorage('kv').getItem<TenantConfig>(`tenant:config:${id}`)

  if (!config) {
    // Alternatively, you could fallback to fetching the config from an API
    throw createError({
      statusCode: 404,
      statusMessage: `Tenant config not found for '${hostname}'`
    })
  }
  return config
}, {
  // Unique cache key
  getKey: (event) => `tenant:config:${event.context.tenant.id}`,
  // Serve a stale cached response while asynchronously revalidating it
  swr: true,
  // Cache for 1 hour
  maxAge: 60 * 60,
  // Important: Prevent discarding tenant-specific headers
  // An array of request headers to be considered for the cache
  varies: ['host', 'x-forwarded-host'],
})
- Retrieve the
tenantinfo from theevent.contextobject that was made available earlier in our Nitro plugin. - Using the
tenant.idas the unique part of the key, retrieve the tenant's configuration object from our KV storage on the Edge. - If no configuration is found for our tenant, we can throw a 404 error, or optionally fallback to fetching the configuration from an API.
- Finally, return the configuration object as the response.
- Importantly, we set the
variesoption to an array of request headers that we want to consider for the cache. This is important because we want to prevent discarding tenant-specific headers, such as thehostandx-forwarded-hostheaders.
We will need to fetch this tenant configuration pretty frequently, so we can improve performance by using defineCachedEventHandler to cache the tenant configuration with a tenant-specific cache key.

Tenant-aware request routing
In larger applications, we may need to proxy requests to an external API that is also tenant-aware. We'll set up a catch-all route that handles requests to this external API and automatically injects the tenant ID:
// server/api/external/[...].ts
import { joinURL } from 'ufo'

export default defineEventHandler(async (event) => {
  // Remove the `/external/api` prefix from the path
  const targetPath = event.path.replace(/^\/api\/external\//, '')
  // Set the request target utilizing our external API's base URL and the tenant ID
  const target = joinURL('https://api.app.com', event.context.tenant.id, targetPath)
  // Determine the request body when applicable
  const requestBody = ['PATCH', 'POST', 'PUT', 'DELETE'].includes(event.method)
    ? await readRawBody(event, false) : undefined

  return sendProxy(event, target, {
    headers: {
      // Add necessary request headers as needed
      // e.g. `Cookie`, `Accept`, `Content-Type`, etc.
    },
    fetchOptions: {
      method: event.method,
      body: requestBody,
    },
  })
})
- To get started, let's create a catch-all server route that will proxy requests to our external API. This route will handle all requests to
/api/external/*and proxy them accordingly. - Construct the
targetPathby removing theexternalprefix from the path. - Set the request target utilizing our external API's base URL and the tenant ID from our event context.
- Use the
sendProxyfunction to proxy the request to the external API, passing along any necessary headers. - Finally, add the
fetchOptionsto thesendProxyfunction to set the request method and body, and any other options as needed.
Now we can use this proxy route in our pages and components:
<template>
  <UserCard
    v-for="user in allUsers"
    :key="user.id"
    :user="user"
  />
</template>

<script setup lang="ts">
// Request is proxied to `https://api.app.com/<tenant_id>/users`
const { data: allUsers } = await useApi('/api/external/users')
</script>
In the example above, we fetch and display a list of users from our external API using the /api/external/users route that we just created.
Runtime Configuration and Integrations
We have identified the tenant and can fetch tenant-specific configurations from our storage providers and APIs, so now we're ready to customize the app.
Keep in mind that data critical to the app should be fetched when the initial request is made during SSR; therefore, you should ensure that these requests are quick and efficient.
As demonstrated earlier, you will want to cache the runtime data whenever possible to avoid unnecessary refetching, utilizing cached event handlers with a unique key that incorporates the tenant ID to avoid cross-request state pollution (e.g. leaking a shared reference between two users).

Runtime configuration
Nuxt's modular architecture and runtime configuration capabilities make it perfect for multi-tenant applications, allowing us to dynamically configure modules and application behavior based on the tenant without rebuilding.
Using common Nuxt modules as examples, we can configure them to be tenant-aware:
- SEO Optimizations: Configure tenant-specific page titles, descriptions, and Open Graph images with the Nuxt SEO module. Generate origin-specific sitemaps and robots files to control crawlers and indexing behavior for each tenant.
- Performance & Analytics Integrations: Enable tenants to configure third-party integrations, such as Google Tag Manager, to track user behavior and metrics via tenant-specific tracking IDs and destinations.
- Dynamic Feature Enablement: Control which features are available to each tenant at runtime based on preferences, subscription level, A/B testing, or product-driven feature flags.
The approach remains the same for all integrations:
- Expose integration options to your tenants for the features they want to configure.
- Determine the active tenant.
- Access configurations via tenant-aware storage providers and APIs.
- Configure modules at runtime based on the tenant's preferences or other criteria.

Brand customization
Now that we have configured the app for the tenant, it's time to customize the look and feel of the app.
Similar to how we fetched the tenant's theme name from the storage provider and added it to the rendered HTML, we can also fetch other data, such as the tenant's custom stylesheets.
Let's modify the tenant-theme plugin we created earlier to also add our tenant's stylesheets into the document <head>.
export default defineNuxtPlugin({
  name: 'tenant-theme',
  async setup() {
    const { data: tenantConfig } = await useApi('/api/config')

    useHead({
      // Add a `data-theme` attribute to the root <html> element
      htmlAttrs: { 'data-theme': tenantConfig.value?.theme?.name || 'default' },
      style: [{
        innerHTML: () => sanitizeCustomCss(tenantConfig.value?.css),
        tagPosition: 'head',
      }],
    })
  },
})
This approach allows tenants to customize global colors, fonts, and other styles to match their brand guidelines, completely transforming the look of the app. Other customizations can be made in a similar manner, such as adding script tags for configured integrations or schema.org tags for SEO.
For other brand elements, such as the logo, we can easily fetch assets from dedicated, tenant-aware endpoints at runtime:
<template>
  <header>
    <NuxtLink to="/">
      <img src="/api/external/assets/logo" width="200" height="80">
    </NuxtLink>
  </header>
</template>
![]()
Using our proxy setup from earlier, this request would be automatically redirected to fetch the tenant-specific logo from the external API based on the tenant ID, providing a completely branded experience for each tenant without any tenant-specific code in our codebase.

Dynamic Pages, Routes, and Components
Enabling tenants to customize the pages and content of the app is arguably the most impactful form of customization, giving tenants the power to craft a tailored experience for their users.
Supporting this level of customization introduces complexity, calling for an architecture designed with flexibility at its core, capable of handling diverse use-cases. Let's go over a few of our key requirements.
Requirements for content management
- Intuitive content management: Page content must be editable by the tenant in an easy-to-use format.
- Dynamic content organization: Page paths must be fully dynamic, empowering tenants to design intuitive navigation systems that best serve their users.
- Highly-customizable components & page layouts: The app must offer highly-customizable components that allow for building complex page layouts that seamlessly align with the tenant's brand identity.
Nuxt Content
When thinking about how to solve for these requirements, you may consider utilizing Nuxt Content, which is a powerful CMS for Nuxt applications. Nuxt Content allows you to create dynamic pages and routes based on easily editable collection sources, such as Markdown files.
With Nuxt Content version 3, content can be sourced from local or remote collections, including Git repositories, bringing us closer to the vision of a fully flexible, real-time application; however, it may fall short of delivering truly live, on-demand content for all of our scenarios.
So let's extract some of the core functionality of the Nuxt Content module to provide alternative solutions for the requirements we laid out for our application.
Markdown and MDC for intuitive content management
We need content editing to be easy and familiar, so, similar to Nuxt Content, we will standardize on Markdown as our content format, as it is widely used and easy to read and write even for non-technical users.
Markdown on its own is great; however, we want to support a more advanced syntax for our content authors.
This is where the Nuxt MDC module plays a key role. Under the hood, the MDC module is what powers Nuxt Content to parse and render Markdown alongside Vue components, providing a powerful and flexible way to create dynamic and customizable content.

Dynamic content organization
Now that we are using Nuxt MDC to render content, we'll need to allow each tenant to organize and store their MDC pages via our API in a way that is easy to manage and organize.
We'll provide API endpoints for tenants to manage their MDC pages in our storage provider, allowing them to create, edit, and delete documents at will. This also requires a way to authenticate and authorize tenants to ensure they can only access their own content; however, we won't cover that in this article.
Tenants will push their pages to our API, mapping the file structure in their directory to path-based logic that will render the page in the app. For example, a file at about/team.md would be served at /about/team in the application.
We'll store the page document under a tenant-specific key (for example in Cloudflare R2): <tenant_id>:<page_path>
Next, let's render the dynamic content in our app.
Rendering dynamic content
To render these pages, we'll create a catch-all route that fetches and displays the content based on the requested path:
<template>
  <MDCRenderer v-if="ast?.body" :body="ast.body" :data="ast.data" />
</template>

<script setup lang="ts">
import { parseMarkdown } from '@nuxtjs/mdc/runtime'

const route = useRoute()
const pagePath = computed(() => encodeURIComponent(route.path))
const { data: pageData, error: pageError } = await useApi(() => `/api/pages/${pagePath.value}`)

if (pageError.value) {
  throw createError({ statusCode: 404, statusMessage: 'Not Found', fatal: true })
}

const { data: ast } = await useAsyncData(computed(() => `parsed-page-${route.path}`),
  () => parseMarkdown(pageData.value),
  { immediate: !!pageData.value, watch: [pageData] },
)
</script>
- In our catch-all
/pages/[...slug].vuecomponent, first we will utilize the requested path to fetch the page from our API. - If the page is not found, we will throw a 404 error, causing our global error page to be displayed.
- Next, we will parse the page content using the
parseMarkdownfunction from the MDC module, which will return an Abstract Syntax Tree (or AST) representation of the document. - Finally, we will render the parsed content using the
MDCRenderercomponent, which will take care of rendering the AST and any internal Vue components, into HTML. We can utilize the MDC document's front matter to configure metadata, such as the page title, description, and other SEO-related information with theuseHeadcomposable in our setup function (not shown here).
I've simplified this a bit for demo purposes, but in a real application, you would want to handle loading states and errors more gracefully, etc.

Highly-customizable components & page layouts
To allow tenants to have complete control over the look and feel of their pages, we can provide highly-customizable components that can be used in their MDC pages.
You could utilize an existing UI library, such as Nuxt UI, or build your own components. Just ensure the components are globally registered in your app in order to make them available to the MDC renderer.
For our example, let's walk through how to build a simple page container component that can be used to create stylized containers such as Cards, Hero Sections, and more.
We'll start by creating a new component called PageContainer.vue that will be used as a primitive component for building page layouts:
<template>
  <component :is="tag" class="page-container">
    <MDCSlot name="default" />
  </component>
</template>

<script setup lang="ts">
const {
  tag = 'div', color, background, margin, /* ...etc. */
} = defineProps<PageContainerProps>()
</script>

<style scoped>
.page-container {
  background: v-bind('background');
  color: v-bind('color');
  margin: v-bind('margin');
  /* ...etc. */
}
</style>
The component accepts a set of props that will allow customizing the structure and styles, such as the tag, color, background, margin, and so on. The props will be bound to the component's styles, allowing for easy customization.
The component will use the MDCSlot component to render any Markdown content passed to the default slot, (which also supports child components), allowing for flexible and dynamic page layouts in our app.
Tenants can then use this component in their MDC documents:
::page-container
---
color: "var(--color-text-secondary)"
background: "var(--color-background)"
border: "1px solid var(--color-border)"
border-radius: "8px"
padding: "20px"
---
### Welcome to MadVue 2025!

Join us for a full day of talks, activities, and
networking with the Vue.js community!
::
The Tenant simply adds our PageContainer component to their page document and configures the component's props to achieve their desired look and feel.
Notice that CSS Custom Properties are used here in the props to set the color, background, and border styles. This allows the tenant to access their brand colors and other variables defined in their theme and custom CSS that were already imported at runtime without having to define them again in the component.
The slot content is added to render the desired text inside the container.
Tenants can also nest components inside each other to create more complex layouts, or we can even offer more complex components to make it easier for them to build their pages.
Let's wrap our PageContainer component to build something more complex.
Here's an example of configuring a more complex component, PageHero, which internally is comprised of several other MDC components: PageContainer, Button, and Image
::page-hero
---
image: "https://images.unsplash.com/photo-1543783207-ec64e4d95325"
color: "var(--color-text-inverse)"
padding: "100px 20px"
text-align: "center"
---
#title
Welcome to our platform!

#description
Join us for an amazing experience with our products and services.

#actions
  :::button{ appearance="primary" }
  Get Started →
  :::

  :::button{ appearance="secondary" }
  Learn More
  :::
::
The Tenant can now simply customize this component's props along with multiple slots to create a unique hero section for their app.

Taking this a step further, you can create an entire library of components that cover a wide range of use-cases that are fully customizable by your tenants.

Since each MDC component is customizable, every tenant app can have a unique look and feel, while relying on the same core components.
You can build anything that is needed:
- Primitive components like buttons, cards, and containers
- Product lists with search, filters, & sorting capabilities
- Interactive pricing tables
- Charts and interactive visualizations
- AI chat widgets
- ...the possibilities are endless

Key takeaways
- Nuxt's server-driven architecture provides an ideal foundation for multi-tenancy, enabling a single codebase to serve unlimited tenant organizations with dramatically reduced maintenance overhead and cost.
- Runtime configuration capabilities allow for dynamic tenant customization - from branding to features - without separate builds or deployments for each tenant.
- The MDC module alongside tenant-aware data retrieval can deliver fully-customizable content and components while maintaining a unified codebase.
Multi-tenancy doesn't have to be complex when you leverage Nuxt's architecture and ecosystem.
Build once, deploy once, and enable your users to completely customize the experience.